Compiling and running programs by typing commands in a terminal window can be a tedious task - especially when you have to do it every 5 minutes. This is where an IDE comes into the picture. Using an IDE makes the task of compiling and executing a program as simple as clicking a button.
There are quite a few IDEs which can be used for Vala programming. Plugins are available for MonoDevelop, NetBeans and Eclipse IDEs which provide syntax highlighting and code-completion. However, these plugins are not without issues. Code completion sometimes stops working for no apparent reason (MonoDevelop 2.8 with monodevelop-vala plugin) and some of the other plugins can be difficult to set up.
Till recently I was using the MonoDevelop 2.8 IDE together with the monodevelop-vala plugin. Now MonoDevelop has moved to v3.0 and the plugin for v2.8 no longer works with v3.0. If you are planning to use MonoDevelop IDE then stick to version 2.8. The monodevelop-vala plugin is available in the Ubuntu repositories.
aptitude install monodevelop monodevelop-valaI'm currently using Geany for Vala programming. Geany is a light-weight IDE that supports Vala and a host of other programming langages. It is by far the most flexible IDE that I have ever come across. You can set it up to compile code for almost any programming language. You can even write custom commands for the 'Compile' and 'Build' buttons in the IDE toolbar.
Now lets see how we can setup Geany for compiling and executing the GTK example that was presented previously. First lets install it by typing the folowing in a terminal window:
apt-get install geany libgtk-3-dev libgee-devI'm assuming that you're using a Ubuntu/Debian system. In case you're not, you can find the download on the Vala Tools page.
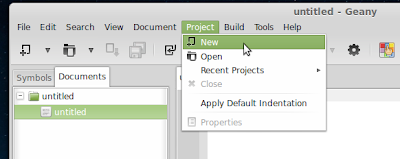
Start Geany and create a new project by clicking on Projects Menu ->New
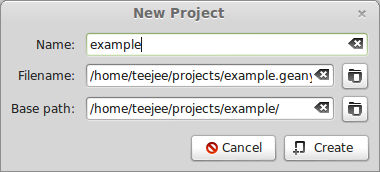
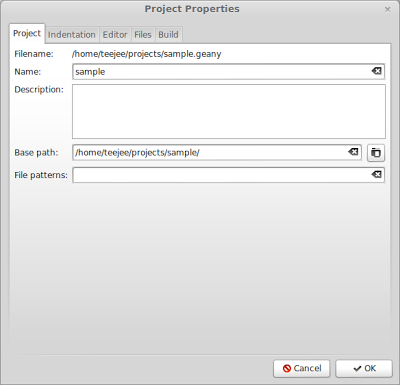
Enter the Project Name and Base Path.
Geany will automatically create a project folder and a .geany file in the base path. The project folder will contain all files that you add to your project and the .geany file will contain your project settings.
Note: The .geany file is a simple text file that you can edit with a text editor. Take a look at the file to see the information that geany maintains for each project.
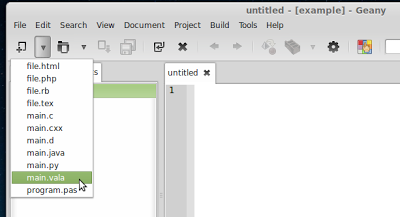
Now add a new source file to the project using the toolbar button.
Copy and paste the code for the application that we created in the previous article.
using Gtk;

class MainWindow : Window  {

  public static int main (string[] args)
  {
    Gtk.init(ref args);  //Gtk intialization

    var window = new MainWindow (); //Create a window
    window.destroy.connect (Gtk.main_quit); //Quit app after window is closed
    window.show_all (); //Makes all widgets visible

    Gtk.main(); //Start the main loop

    return 0;
  }

  public MainWindow()
  {
    this.title = "My First App";
    this.border_width = 10;
    this.set_default_size (250, 60);
    this.window_position = WindowPosition.CENTER;
    this.destroy.connect(Gtk.main_quit); //Quit app when window is closed

    var btnClear = new Button.with_label ("Clear Recent Documents");
    btnClear.clicked.connect (clear_history); //Connect event with function
    add(btnClear);  //Add button to window
  }

  public void clear_history ()
  {
    string HOME = Environment.get_home_dir ();

    try {
      Process.spawn_command_line_sync (@"rm $HOME/.local/share/recently-used.xbel");
      Process.spawn_command_line_sync (@"touch $HOME/.local/share/recently-used.xbel");
      messagebox_show ("Success", "Your recent documents history has been cleared");
    }
    catch (Error e){
      string msg = e.message;
      stderr.printf(msg);
      messagebox_show ("Error", msg);
    }
  }

  public void messagebox_show(string title, string message)
  {
    var dialog = new Gtk.MessageDialog(
       null,
       Gtk.DialogFlags.MODAL,
       Gtk.MessageType.INFO,
       Gtk.ButtonsType.OK,
       message);

    dialog.set_title(title);
    dialog.run();
    dialog.destroy();
  }
}
Press CTRL+S and save the file as main.vala.
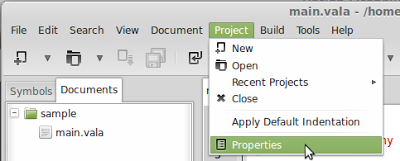
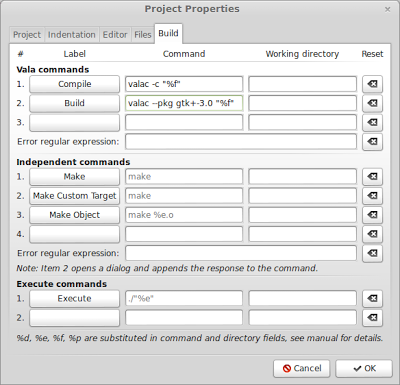
Before we can compile our program we need to tell Geany how the compilation has to be done. Go to the Project menu and open the Project Properties dialog.
Go to the Build tab.
As you can see, Geany has already added the commands for compiling and building our program. However we need to add a reference for the GTK library since our program uses GTK.
Change the build command from:
valac "%f"to:
valac --pkg gtk+-3.0 "%f"That's it! Now we can build our application using the Build button in the toolbar.
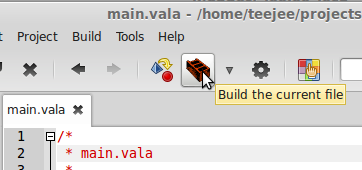
Click the Build button to compile your program.
You can see the compiler messages in the Status panel.
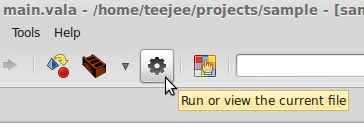
Click on the Run button to test your application.

